Batocera on Steam Deck: Setup Guide
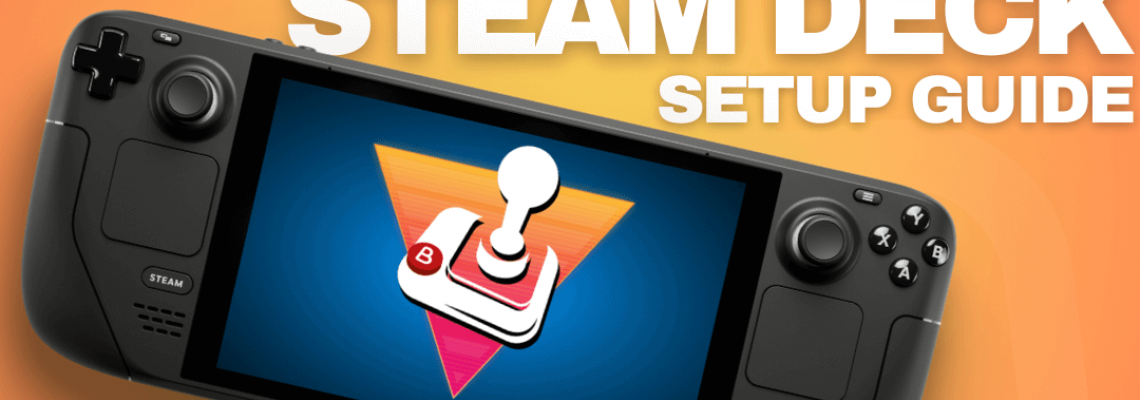
Batocera on Steam Deck: Setup Guide
We received this story from Dan W., a member of the RH community.
Why Not Batocera?: Building better Steam Deck Emulation
Earning my Game Of The Month
Tinkering, Linux custom operating systems, and the RH Discord Game of the Month are three of my favourite aspects of retro handheld gaming culture, and this post is designed to guide and celebrate them.
I enjoy playing around with handhelds. Nothing is too big, like soldering, but my collection's handhelds are more than store-bought devices. Though it has all the trappings of spiritualism, I still like the idea that the more you personalize something, the more you embed yourself in it.
I adore the RH Discord GOTM because it's one of the most incredible places on the internet. It makes playing old games more fun and incentivizes those like myself who have portable collections to get them.
Additionally, Linux vintage handhelds appeal to me since they "just work."
I've set myself the task of figuring out how to "earn" my game of the month by making a portable device sitting on my shelf more enjoyable and then utilizing it to play one of the three games chosen for a specific GOTM.
A Love Letter to Batocera
The community's perception of Batocera has frequently baffled me. Many community members share my fondness for Linux-based handhelds since they generally "just work," but Windows- and Android-based handhelds often require specially set emulators. I had my first satisfying Retro Handheld experience with 351elec. Like many others in the community, I have experimented with ArkOS and JelOS, both of which have devoted fan bases that Batocera does not. I don't get that. A list of all the devices tested on the Retro Game Corps YouTube channel would show that more would run Batocera than any other operating system, even though Batocera isn't a flawless experience on all devices.
In contrast to most other solutions, which have been rumoured to be decommissioned by the developers at some point during the previous three years, Batocera gives a degree of certainty in its release cycle. There are three new updates annually, each adding support for new devices and emulation enhancements. Batocera seems to be run like a typical Linux distribution, although other options feel more like a hobby.
In comparison to the alternatives, it also seems less po-faced. From the 80s-style menus to the love-or-hate-it beginning animations and music, Batocera has a certain amount of cheerful enthusiasm about the user experience right from the start. It makes you grin if it doesn't irritate you.
However, Batocera isn't flawless, particularly when considering the Steam Deck experience. At the time of writing, I couldn't locate a single "all-in-one" tutorial that would have given Steam Deck users a better emulation experience, even if there are tips for installing Batocera in the wild, setting it up, and improving it. My task is to construct a better Batocera on Deck, record my progress, and determine whether it can function as a GOTM device.
But Why NOT Batocera?
The Steam Deck's Batocera experience isn't flawless just yet. Games from your Steam library can be played on Batocera but must be compatible with Linux by default. Additionally, games that use Proton won't run on Batocera. You have less influence over battery life because there aren't any TDP settings. Additionally, since 64GB deck owners will want their Micro SD card slot for Steam OS storage, they most likely won't be able to spare it.
Ingredients
The patient has a 64GB Steam Deck with a 256GB SSD and poorly applied crimson decal skin.
A USB keyboard with an adapter to connect it to the Deck and a large SD card (I used 200 GB) assisted.
Initial Set Up:
I used BlanaEtcher, which I downloaded from https://etcher.balena.io/#download-etcher, to burn the Batocera image for the Steam Deck to an SD card after downloading it from the Batocera website (https://batocera.org/download). Anyone who downloaded a custom operating system for a vintage handheld will recognize the steps.
For people who don't, it's as easy as:
Installing BalenaEtcher on your computer after downloading the files above.
Selecting "Flash from File" after launching BalenaEtcher
Finding your Batocera download location, choose it, and press "open."
Returning to the BalenaEtcher menu, pick your SD card and click "Select Target."
Confirm the destination if you're using a vast SD card like me.
To transfer your games, you must first boot into Batocera to let it complete the initial setup, then turn it off and take out the card. To accomplish this:
⦁ To access the Deck's boot menu while the Deck is off, press the power button while holding down the Volume Down button.
⦁ After the boot menu appears, choose your SD card with the joypad and the "A" button.
⦁ Wait a little while as Batocera repartitions the SD card and starts up. When the intro animation and music begin, the process is complete. Not everyone enjoys these, and I'll explore how to turn them off later.
⦁ Establish a wifi connection with the Batocera Steam Deck. Press the start button (the one with the three vertical lines next to the X button) to bring up the main menu. Then:
⦁ Choose Network Settings and turn on wifi.
Hold on. You may have to wait up to two minutes as the Deck looks for wifiWi-Fi. In the worst situation, a reset will be necessary.
Wait a moment. While the deck searches for wifi, you might have to wait up to two minutes. In the worst-case scenario, a reset will be required.
⦁ Batocera can wirelessly transmit files to other devices on the same wifi network when they are linked to one.
⦁ Entering "⦁ \\batocera" into the search allows a Windows device to connect to the Deck.
⦁ Two shares, "root" and "share," should be visible on the first screen; all pertinent files will go into "share."
⦁ The file organization within Share should be simple: bios files belong in the bios folder, and roms go in the appropriate section of the roms folder. PlayStation ROMs go in the PSX folder, while GameBoy ROMs belong in the GB folder.
Batocera must refresh the game list after the file transfer is finished. This can be accomplished manually by clicking the start button (the button with three horizontal lines), heading to Game Settings, choosing Update Game List, or rebooting (pushing Volume Down during boot to open the boot menu).
Enhancement 1 – A Proper Boot Menu
The Steam Deck that remains after the initial setup can boot into a retro-themed environment, but it requires us to hold down the volume key while it boots up, which is not ideal. Users can select the primary boot device on the Steam Deck, but to do so, they only need to hold down the volume key to access SteamOS to play PC games. Neither of these options would be a part of an actual Batocera experience.
I will install a boot menu option I found at https://www.youtube.com/@10MinuteSteamDeckGamer/ to choose the environment I want to boot up correctly.
Clover is the menu choice, and it can be installed from the Steam Desktop using a pretty easy script that requires inputting text into the command line. Anybody with access to a Steam Deck dock will have a better experience than I did chaining cords and adapters together, even if entering the commands using the Steam Deck's virtual keyboard is technically feasible.
To install Clover, follow these steps:
Verify that the Batocera Micro SD card is positioned correctly.
Open the Steam desktop after booting into the SteamOS.
Verify that you are using wifi.
Get the Konsole terminal open.
Enter the five commands below, hitting return at the end of each line.
⦁ cd ~/
⦁ git clone https://github.com/ryanrudolfoba/SteamDeck-Clover-dualboot
⦁ cd ~/SteamDeck-Clover-dualboot
⦁ chmod +x install-Clover.sh
⦁ ./install-Clover.sh
⦁ The install script will then launch. Verify that you have a sudo password set (the password for the Linux root admin account), and if so, run it. If, like me, you have never accessed the Steam Deck's root account, the script will ask you to create a sudo password before it exits. Follow its instructions and enter the password.
⦁ If you had to set a sudo password, the command that starts the script,./install-Clover.sh, must be rerun. You can do this by tapping the keyboard's up arrow to select the previous command and pressing return to execute it.
⦁ After requesting your (perhaps newly formed) sudo password, the script asks which operating system you want to have as the default; I selected SteamOS.
⦁ You may now relax and watch as the script should begin to execute automatically.
Upon completion, the Clover menu will appear every time my Steam Deck is turned on, allowing me to choose the environment I wish to boot into. Clover will immediately detect the OS and provide it as an option, making it a simple triple-boot computer in case I ever decide to install Windows on my Deck (maybe with a larger SSD).
Enhancement 2 – Emulating the Nintendo Switch
Because Batocera views the Switch as a modern technology and its scope as abandonware, it does not have built-in support for Nintendo Switch emulators.
There is an unofficial Batocera extension on GitHub, available at https://github.com/ordovice/batocera-switch. I'm going to use the handy installation script on the GitHub page to install it. My current unit has a terrible red decal, but I have a replacement Switch-themed skin that I bought from dBrand. However, I lost it during a house move.
To install:
Launch Batocera on the Steam Deck while admiring the freshly installed boot menu.
Verify that a USB keyboard is attached.
Establish a wifi connection with the Batocera section of your Steam Deck. You must reconnect because Batocera and SteamOS do not share wifi settings.
To access the Batocera Main Menu, press the start button (the button with three horizontal lines next to the Y button).
To activate the wifi, select "Enable wifi."
Choose your wifi network and wifi SSD.
Choose the wifi key and input the password for your wifi network. The USB keyboard will be helpful here, but I still need to use the joypad and buttons to press enter.
"Wifi Enabled" should appear as a message; verify that you can see an IP address; if not, there might be a password error.
To return to the original Batocera screen, press B a few times. To access the Batocera desktop, press F1 on the keyboard.
Press F4 on the keyboard to launch the terminal application.
Enter the subsequent command.
bash | curl -L switch.Batocera.pro
Take a seat back and unwind as Ryujinx and Yuzu are installed.
After the script is finished, type "exit" and press return to close the command line. To return to the Batocera main screen, press Control+Q.
The script will add folders to the Switch game partition and install the Switch emulators. After turning off the Steam Deck, ejecting the SD card, and reinstalling it on a PC, we can see a new Switch folder. This folder contains the Switch games, while the Bios sub-folder contains the prod.keys, title.keys, and firmware (however, the firmware is not required if you are merely using Yuzu as an emulator).
Once more, tap the Start/Three Dot menu and select Game Settings -> Update Game List if there are any problems with the games not appearing.
Enhancement 3 – Amending the Boot Animation and Music
This is entirely a personal choice. Although I adore the cozy embrace of the Batocera interface, I don't like the opening music, especially if I'm booting up my Steam Deck in public and can't mute it before the music starts. Fortunately, Batocera allows you to customize the start-up intro to your liking.
The main Batocera menu, or the menu that appears when the boot-up animation is complete, is where you can access the Batocera choices. Select System Settings -> Splash Setting after pressing the Start button (the three-striped button on the Steam Deck next to the Y button).
The setting I've chosen is "Silent Video/User Set Splash," which turns off the music while leaving the animation in place because I don't like the music but don't mind the entrance animation.
Additionally, I don't always enjoy the music that plays on the Batocera main screen.
Although the Batocera desktop command line offers more sophisticated options, such as the ability to select any intro video and music, I'm content with the default muted video alone.
Was it worth it?
I'm finished now. Every time I restart my Steam Deck, I can choose from various games from beyond the PS3 and any platform released before it. I also have a familiar and cozy UI with a vintage theme. While EmuDeck is undoubtedly an excellent choice for most people, this is a better fit for me.
Can It Play Game Of The Month?
The games chosen for this month's RH Game of the Month were Fire Emblem: The Sacred Stones (GBA) for the 2000+ era, Resident Evil 1 (originally PS1) for the 96-99 era, and Doom (Multi-System) for the Pre-95 era.
I decided to play Resident Evil out of the three titles because Resident Evil 2 was the first RE game I ever played. All remakes and remasters are playable when a game is chosen for GOTM, and a Steam Deck running Batocera should be able to play the original release, the DS port, or the Game Cube remaster.
As someone with a reputation for enjoying a good horror movie, Resident Evil was the first game to be widely referred to as "Survival Horror," so it was my pick for the month. I ultimately chose to play the PS1's Directors Cut version. The voice acting and storyline of the game haven't held up well over time, but the controls aren't nearly as annoying as I was made to think they would be, and the dogs and hunters can still deliver good jump scares. Overall, the game does a decent enough job of building tension as the ending draws near, although playing it in 2023 brings out some of its shortcomings that weren't as noticeable in 1996.
Bully on the PS2 was the most challenging game to get chosen for GOTM thus far, and the community anticipates that the PS2/GameCube generation will be the natural barrier for GOTM games for the foreseeable future. Accordingly, it is reasonable to assume that a batocera-ed Steam Deck will play any GOTM game for a considerable time.
GOTM is available all month long. Every game you finish, as shown by submitting pictures, gets you points that can eventually be redeemed for RH merchandise.
Closing Up
Batocera rekindled my admiration for the Deck. Before I installed it, I thought of the Deck as a practical portable—something functional but lacking the fun of other gadgets. I feel much more affection for my Deck now than I did before. I was able to wrangle the retro side of EmuDeck into an interface that resembles the ones I use on other handhelds and set up a decent boot menu.
In essence, batocera contributes to the retro vibe of everything.
