Anbernic RG406V and RG406H Setup Guide
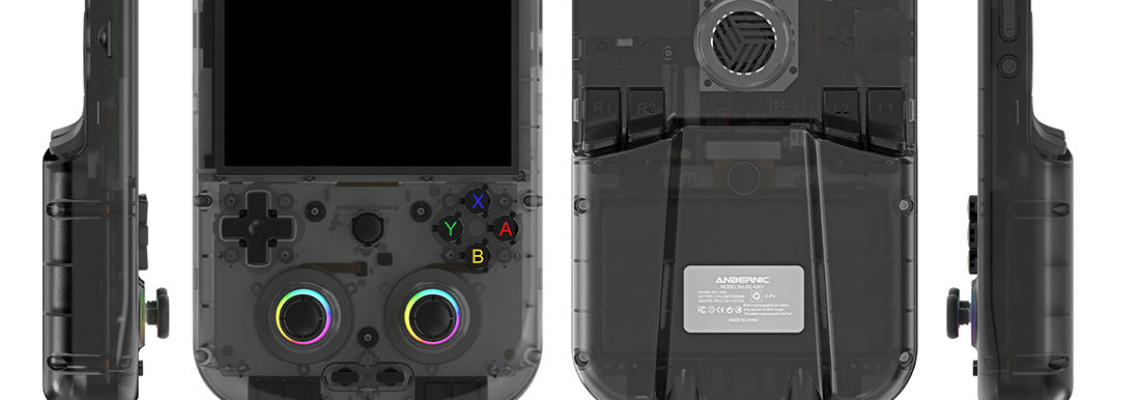
Anbernic RG406V and RG406H Setup Guide
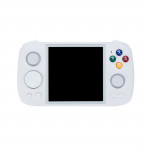
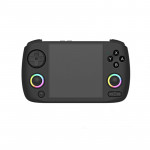
TheIt's RG406H and RG406V will likely rank among this year's best offerings. Since these are the only gadgets that can display a 4:3 720p screen at the moment, they work well with almost every console that was produced prior to 16:9 becoming the new norm. They perform exceptionally well in PS2 and Gamecube games thanks to their strength, and the oddities in their physical design are at an all-time low.
Because Anbernic has been producing retro handhelds for a few years, setting up a new Android device to function the way you want it to can seem like an insurmountable task, but this tutorial can help. By the time you finish reading this guide, your RG406H or RG406V will be prepared to play the games you purchased.
Getting Started
Comparing the RG406 line of devices to other Android smartphones, the setup process is relatively straightforward. Of all these handhelds, Anbernic offers the most effortless setup process; all you have to do is hit A on the welcome screen, wait for your device to "configure," and you're ready to go.
The only drawback is that many of the necessary stages that are usually part of the setup procedure are bypassed. To connect to your wi-fi network, you will need to manually navigate to Settings or swipe down from the top of the device and hold the wi-fi symbol. You are under no obligation to utilize wi-fi with this gadget, but you will lose out on some of the more convenient features we will discuss later.
Now would be a good time to launch the app and log in if you intend to use the Play Store. You will be able to access any purchases, app updates, etc., that you have done on the account you are now connecting to on the RG406.
This tutorial will presume that you want to overcome the obstacle from beginning to end and that you have an RG406 with an empty SD card. So let's get started.
What You'll Need
- RG406V or RG406H Anbernic
- The hardware, operating system, and procedures are the same for all of these devices.
- Greater capacity than a 32GB Micro SD card
- Wi-fi connectivity
- You can transfer the necessary data from a PC if you don't want to use wi-fi on your device, but it will be much more challenging.
Recommended Accessories
Only a few accessories are required for the setup procedure itself. The simplest and most convenient way would be to use a computer and an SD card reader, but if your phone can read SD cards utilizing some dongle, you can also follow all of these instructions there. Just keep in mind that using a smartphone for all of this amounts to cruel digital torture.
Micro SD Cards
When it comes to SD cards, I advise individuals to purchase the most storage space they can reasonably afford. Get at least 128GB if you consider the RG406 an end-game console, for instance, as you will never want a screen larger than 720p 4:3 on a system capable of playing a good number of PS2 games.
You would need more than 300GB of free space for an SD card that holds about 100 of the best selections from all the old consoles and handhelds up to the PS1. However, you may easily reach the top 25 and keep much under 128GB if you measure your expectations.
You can get by without an SD card thanks to the RG406's 128GB of internal storage. Some of the PS2 and GameCube libraries, however, are easily handled by the Unisoc T820. I recommend utilizing a high-capacity SD card once more. In this manner, when the present SD runs out of space, you won't have to spend those hours transferring material between them.
Additionally, you don't have to start from scratch if something occurs to your handheld and you need to reset it completely.
- Micro Center MicroSDXC (16GB – 2565GB)
- SanDisk Ultra (32GB – 1.5TB)
- Samsung PRO Plus (512GB)
- Silicon Power Superior (1TB)
- SanDisk Extreme (1TB)
SD Card Readers
- UGREEN 2-in-1 SD Card Reader
- Anker PowerExpand+ 2-in-1
- uni USB-C SD 4.0 Card Reader
Controllers
There are ways to make devices with Bluetooth and HDMI out into home consoles. Any device that you plug the RG406 into can get 1080p output. Its Bluetooth capability makes it reasonably straightforward to attach a controller with it and create a play style that is akin to the Switch's docked operation.
However, lower your expectations a little. The primary feature of the Switch is its ability to be placed in its dock and played on a screen without any problems. Although manually attaching a Bluetooth controller and connecting an HDMI connection to a screen can occasionally be a laborious procedure, it can give your old games a new way to be played.
I've listed a couple that might be worth looking at below, and we have a piece that talks about several well-liked budget controller options around $40. Any controller will work but read Ban's entire post if you want something worthwhile.
- Anbernic RG P01
- Machenike G5 Pro
- 8BitDo Ultimate 2C
SD Card Preparation
When your RG406 arrives, it's a good idea to get your SD card ready so you're prepared to go. To install the apps or use the BIOS files in the instructions below, you still need a device, but you can construct your SD card by making sure you always have the data you need.
ROMs and BIOS Files
You can transfer and install ROMs anywhere you like because the RG406 runs Android as its operating system. I usually make a folder called "Roms" in the root of my SD card and put folders for each console I want to play on it.
If you have a massive collection with hundreds of titles, it might be risky and complicated. I would divide the titles into alphabetical or category folders for those of you who are digitally hoarding. For example, I might have the PS1 folder with my games divided into directories called PS1 (A – F), PS1 (G – N), and so on if I have hundreds of PS1 titles.
I use the same naming scheme that many Linux-based handhelds do in the screenshot above to arrange my ROMs in a folder. I only do this so I don't have to bother about renaming, editing, or changing files when I move this one SD card between devices. It simplifies life.
We've put together a list of suggested BIOS files for every system below. You can't acquire these files from us.
The BIOS is the first place to look if any of your games or consoles are acting strangely or won't start. The Settings section of your preferred emulator will have a section where you can find and enter a BIOS file if that is an option. The filenames ought to be precisely the same as those listed below.
- 3DS
- aes_keys.txt
- DS / DSi
- bios7.bin
- bios9.bin
- firmware.bin
- dsi_bios7.bin
- dsi_bios9.bin
- dsi_firmware.bin
- dsi_nand.bin
- Game Boy (Optional)
- gb_bios.bin
- Game Boy Advance (Optional)
- gba_bios.bin
- Game Boy Color (Optional)
- gbc_bios.bin
- Sega CD
- bios_CD_E.bin
- bios_CD_J.bin
- bios_CD_U.bin
- Dreamcast
- dc_boot.bin
- dc_flash.bin
- naomi_boot.bin
- Saturn
- Kronos
- saturn_bios.bin
- Beetle Saturn
- sega_101.bin
- mpr-17933.bin
- PS1
- scph5501.bin
- PS2
- scph-70012.bin
- scph-70012.MEC
- scph-70012.NVM
- scph-70012_BIOS_V12_USA_200.BIN
- PSP
- PSVUPDAT.PUP
- PSP2UPDAT.PUP
Recommended Apps
The default Android home screen will appear as soon as the setup process is complete. Numerous emulators are also placed on the devices by Anbernic, but I rarely use them. I'll explain how to either disable Retro Launcher or remove the preinstalled apps entirely in the section below on how to disable Retro Launcher.
Apps & Games
For this section of the book, emulators, games, and apps are entirely distinct entities.
The RG406 runs Android 13 and has a working touchscreen. You can download and use any apps you would be interested in using on the phone, and they should work well on this one as well. The apps listed below are just ones worth looking at, but you are not limited to them.
Nevertheless, not all games support controllers (such as the one included with the handheld). For example, Pokemon TCG Pocket does not support landscape mode or controllers, but it is surprisingly comfortable to play in portrait mode on an RG406V.
Additionally, keep in mind that if you download APKs from any place, you should find the downloaded file by using your preferred file browser (Files is the one that is installed by default). Usually, it's located in your Downloads folder.
When you try to install the app on Android, a popup will appear stating that you must open Settings in order to enable the app to be installed from the app you are trying to open the APK in. Press the Settings button and then tap the toggle to enable it. In a moment, a popup will appear asking if you wish to install the app.
I suggest a couple of apps that are worth checking out.
Recommended Apps & Games
- Moonlight – PC game streaming
- MiXplorer – file explorer with (S)FTP server functionality
- P8GO – Pico-8 emulator with Android controls
- Steam Link – stream your Steam library from your PC
- XBPlay – remote play from your Xbox Series or One console
- Chiaki-Up – PS5 remote play
Games
- AM2R – A Metroid 2 Remake (will have to find .apk on your own)
- 2Ship2Harkinian – Majora's Mask port available on Android
- Balatro – addictive card shuffling game
- Stardew Valley – farming simulator, pixel-based design
- Pokemon TCG Pocket – classic Pokemon TCG but revitalized and modern
- Dead Cells – fun 16-bit inspired platformer
Emulators
Regarding emulators, the Google Play Store does have most of them, but I suggest utilizing versions that the developers have published straight to GitHub (or another location). Using Google Play has no adverse effects. However, it can take longer for updates and fixes to be released. For instance, the free version of PPSSPP is available on F-Droid or their official website, whereas the Gold edition is exclusively available on the Play Store. It can take a few days until the app is available on the Play Store if an update is released to fix a bug.
Most PS2 and Gamecube titles can be consistently played on the RG406, and RetroArch supports most earlier platforms. In light of that, the following apps are suggested for your RG406.
- RetroArch
- MelonDS-DS (DS)
- Lime3DS (3DS)
- M64Plus FZ Emulator (N64)
- Yaba Sanshiro 2 (Saturn)
- Dolphin (GameCube / Wii)
- DuckStation (PS1)
- AetherSX2 / NetherSX2 (PS2)
- PPSSPP (PSP) [Gold – $4.99]
- Redream (Dreamcast)
It is important to note that the NetherSX2 patch's base application is AetherSX2. After downloading the AetherSX2 app from the URL above, patch the application by following the guidelines on the NetherSX2 Github.
Alternative Emulators
My recommendations are listed in the list above. Some of them have alternatives that offer less or perform worse on the RG406, but you are welcome to experiment and use them however you see fit.
There are Citra MMJ and CitraEnhanced in place of Lime3DS. In the foreseeable future, Lime3DS will merge with a former Citra fork to become Azahar. Save states and, in certain situations, speed improvements are among the extra capabilities that Citra Enhanced provides that were absent from Citra.
A fork of MelonDS is called MelonDS-DS. Although it hasn't been updated since December 2023, the original MelonDS for Android is still functional. Another new DS emulator that aims for improved performance is called NooDS. It is still relatively young, but as it develops, it may be interesting to watch.
The comparison between Flycast and ReDream is intriguing. Redream is unable to play the arcade games from Naomi and Naomi 2, however Flycast can. However, in the majority of the games I tested, Redream provided more excellent performance. Some games had trouble reaching 30 frames per second on Flycast, but I had no problem reaching 60 on Redream.
RJNY Obtainium Emulation Pack
Many of the suggested Android emulators can be automatically installed by using the RJNY Obtainium Emulation Pack from his Github. While some of those above are present, some are not.
It is necessary to install Obtainium before using RJNY's bundle. And have a look—we have the ideal manual for that exact use.
Here's a full list of what's included in the RJNY JSON:
- Dolphin (Development Versions)
- MelonDS (stable)
- MelonDS (nightly)
- Lime3DS
- NetherSX2 Patch [TRACK ONLY]
- OdinTools
- PPSSPP
- RetroArch (AArch64)
- ScummVM
- Turnip Drivers [TRACK ONLY]
- Vita3K
- Winlator
This does not mean that after you've imported the JSON into Obtainium, you should install them all. If you want, you should focus on the ones listed above.
The primary purpose of emulators that state "track only" is to inform you that the program will monitor and notify you of updates, but not those that are specified. The only explanation for this is that some of the apps aren't installable. NetherSX2, for instance, is only accessible via a patch.
Quick Settings & Disable Retro Launcher
Anbernic's proprietary launcher, Retro Launcher, is preinstalled on the RG406. Although it has a simple design and generally works well, I never choose to use it. It's crucial to have complete control over the appearance and functionality of my games, and RetroArch usually provides the necessary adaptability.
Either bundle them into a folder, use a frontend to completely ignore them, or hold an app and touch App details, then select Uninstall from the menu that appears.
To turn Retro Launcher off, swipe from the top of your portable device and make sure RGLauncher is off.
Additionally, you can adjust the fan speed, turn on or off Bluetooth and wi-fi, switch between the Nintendo and Xbox d-pad layouts for the buttons, and alter the colour of the LED joystick lights.
Frontends
Android 13 is pre-installed on the RG406 line of smartphones. You can use the default launcher if that's what you're most accustomed to. It works precisely like Android on any other phone or tablet you've ever used.
However, frontends are really significant enhancements to these gadgets' functionality. Frontends may change everything from box art to custom themes, usability, and just being able to view your complete game library.
The concept of a new or distinct home screen may seem odd to those who are unfamiliar with Android, but trust me, it's not. Frontends, launchers, or whatever you choose to call them, are deployed similarly to apps and work similarly to them.
We've listed a few of the more well-known ones below, but if you want my personal preference, I'll nearly always go with Daijisho.
- S-DE for Android
- Daijisho
- Console Launcher
- LaunchBox
- Beacon Game Launcher
- Plain Launcher
- Pegasus
- ARC Browser
- RESET Collection
Your choice of the front end is entirely up to you, even though Daijisho might be my favourite. Some people despise the ones I love, while others love others.
Our review of Console Launcher 2.0 is excellent, and some of its features certainly seem interesting. One of the more popular frontends that users might not even be aware of has a name ES,-DE, which is covered in our post. People may find it easier to become used to its operation because it is usually provided as the operating system on Linux-based devices.
And it is what makes these different frontends so enjoyable. They all perform the same fundamental function of arranging your games into attractive lists with boxart and other details, but how they do it will determine which one you like best. The concepts of Daijisho and the way I've been accustomed to using, adjusting, and making the most of it are the only reasons I enjoy it.
RetroArch Setup
Installing RetroArch on the RG406 is identical to installing it on any other Android console. What shaders or filters you choose to use and which cores you bother installing might be the only minor difference.
We have a comprehensive guide on how to install RetroArch and make the most of it. Mikhailov explains how to apply different shaders and custom palettes, configure hotkeys and inputs, and download cores.
Selecting the best cores for each system is necessary if you decide to use RetroArch for your consoles. A developing master list of popular cores is provided below; however, I have indicated my preferences for the consoles with an asterisk (*).
By no means are the other options awful, but some of them have fewer features or are less compatible. For example, mGBA is more successful at playing bootleg rips and ROM hacks on the GBA, but PSP might have more excellent compatibility overall.
Recommended Cores
- Mesen*
- FCEUmm
- Nestopia UE
- SNES
- Snes9x-Current*
- bones
- bones-hd beta
- Nintendo 64
- Mupen64Plus-Next*
- ParaLLEl N64
- Nintendo DS
- melonDS*
- DeSmuME
- Game Boy & Game Boy Color
- Gambatte*
- SameBoy
- Game Boy Advance
- mGBA*
- PSP
- VBA-M
- Sega Dreamcast
- Flycast*
- Sega MS/GG/MD/CD
- Genesis Plus GX*
- PicoDrive
- Sega Saturn
- YabaSanshiro*
- Beetle Saturn
- Sony PlayStation
- Duck station*
- SwanStation
- PCSX ReARMed
- Sony PlayStation Portable
- PPSSPP*
If you have trouble launching games using RetroArch, you might wish to use an app that is accessible for the cores you have selected instead. As a result of app changes, specific RetroArch cores may be years behind what the most recent updates included.
However, standalone apps may provide less flexibility. Shaders, filters, and console or game-specific settings can all be applied in RetroArch. Only one or occasionally, none of the functions are available in standalone apps.
Shaders and Filters
You have a lot of options when it comes to shaders and filters, but in the end, you have to get the look you want. Some people wish to scanlines, some want geometric corners to mimic a CRT TV, and some want nothing at all so they can feel the edges of every pixel on the screen.
The RG406 boasts one of the best screens in a vintage handheld device. It's a 4-inch, 4:3 screen with 720p. On all retro systems before the PS2 and Gamecube, it can perform direct integer scaling; even on those, it can achieve 1.5x integer scaling. This offers you a plethora of choices and possibly the most effective way to see them.
As an illustration, I switch between the various consoles using the fast-crt and fast-LCD portable shaders. It doesn't really change the image other than adding lovely, even scanlines over it. You can apply more shaders and layer them to create a linked effect if you wish to use more than one.
I'm using both the crt-easy mode-geom and fast-crt shaders in the picture below. To make it look like a vintage CRT, it adds a light vignette, curves the edges, and slightly changes the colours.
This represents only the beginning. Although the guide above provides more detailed information, you are free to select the ones that you think are the most attractive. If you want, feel free to try them all.
So…What Now?
Everything is set up on your smartphone. You are finished with retro gaming. Using Settings, you may further personalize your handheld by changing the layout of your apps if you don't have a frontend, adding or selecting a beautiful background, or downloading frontend themes and setting them up the way you like.
By pressing the home or back button in the apps above, you will be able to access a menu called Settings, which contains all of the necessary settings to set your buttons correctly, change any ROM or BIOS paths, and even edit some fine-grained details about how the games will play on your handheld. Each of the apps above has its variety of settings, scaling options, and configurations, all of which are simple to locate and set correctly for your RG406.
You're good to go, though, as far as configuring your device to play games as well as possible.
Closing
At this point, your RG406V or RG406H should be fully configured and prepared to play. Your options are genuinely limitless because you have access to a whole Android gaming device. Go ahead and try out any Android apps that are available! Try experimenting with any settings you wish to change!
Regarding how games appear and function, you have a ton of options, like aspect ratios, resolutions, frameskips (ugh!), and a ton more.
This guide should have helped you make your handheld feel like your handheld. However, the ability of people to support one another is what makes this community survive. With every guide I create, I want to do that, and I hope I was successful in doing so here.
Go ahead and play your preferred game now. We are all aware that you have one of them and have been eager to start that one unique game. Feel free to enjoy yourself.
