Knulli on TrimUI Smart Pro: Setup Guide
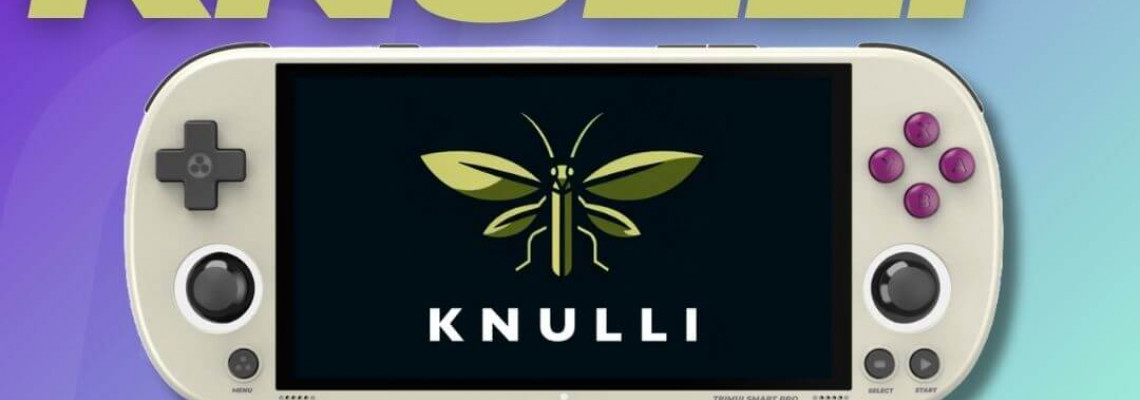
Knulli on TrimUI Smart Pro: Setup Guide
When it first came out, the TrimUI Smart Pro was an interesting gadget, providing some competition to Retroid's Pocket 3. The primary distinction is that the Smart Pro uses a proprietary Linux interface rather than Android.
Regretfully, the "stock" UI is not as efficient as one would want and leaves much to be desired. Fortunately, more developers could purchase it as the price began to decline. Knulli may now be installed on the TrimUI Smart Pro, which offers a recognizable interface and several enhancements.
Set Up Knulli on TrimUI Smart Pro
- Get the Knulli build by visiting the GitHub page.
- KNULLI GitHub
- Connect your PC to your microSD card.
- The Knulli Build should be extracted.
- Launch your preferred USB formatting tool. Here are some suggestions.:
- Rufus
- Win32 Disk Imager
- BalenaEtcher
- Choose the Knulli Disc Image that was just extracted to flash your microSD card.
- Once the flashing process is complete, remove the card from your computer.
- In your TrimUI Smart Pro, insert the card.
- Await the completion of the boot process.
You may have seen that you cannot add your ROMs or other files once the card has been flashed. You're still in luck, though, because it's only a glitch that will be fixed someday.
- Press the Start button on your TrimUI Smart Pro.
- Choose System Settings by scrolling down.
- Under the Advanced section, find and choose Frontend Developer Options.
- Choose Format a Disk from the Tools section after scrolling down.
- Select EXFAT as the file system.
- Choose Format Right Away.
- Give your TrimUI Smart Pro a reboot.
If you reboot but see the Knulli boot screen for longer than a few minutes, press and hold the Power button until the screen turns off. Then, to restart it, press and hold the Power button.
Once the Smart Pro has finished booting up, could you turn it off again? After that, please remove the microSD card, connect it to your computer, and move all your ROMs and related BIOS files to it. Reconnect it to your Smart Pro, and presto! Knulli will be operational on the TrimUI Smart Pro!
Pico-8 on TrimUI Smart Pro via Knulli
- Visit the Lexaloffle website to buy Pico-8.
- Get the Raspberry Pi file here.
- The downloaded file should be unzipped.
- Get rid of the pico8 file.
- Change the name pico8_64 to pico8.
- Make a new folder called pico-8.
- Put the new folder in the user data/bios/ directory.
- Upload the pico8, pico8_dyn, pico8_gpio, and pico8.dat files to the newly formed folder.
- On your PC, create a new text document.
- The following should be copied and pasted into the file:
- <?xml version=“1.0” encoding=“UTF-8”?> <systemList> <system> <name>pico8</name> <emulators> <emulator name=“lexaloffle”> <cores> <core default=“true”>pico8_official</core> </cores> </emulator> <emulator name=“libretro”> <cores> <core>retro8</core> </cores> </emulator> </emulators> </system> </systemList>
- The file is called es_systems_pico8.cfg.
- The.cfg file should be moved to the following location:
- /userdata/system/configs/emulationstation/
- After inserting the microSD card, switch on your TrimUI Smart Pro.
Windows enjoys doing things and altering files inappropriately. As the Knulli developers noted, the Pico-8 file permissions may have been changed.
- Ensure you have an SSH client, such as PuTTY, installed on your PC.
- Turn on the WiFi on your Smart Pro.
- Under Network Settings, take note of the Hostname.
- Return to the Settings main menu and choose System Settings.
- After scrolling down, choose Security.
- Remember the root password.
- On your PC, launch your SSH client.
- Enter your Hostname and root password to log in to your TrimUI Smart Pro.
- Put enter the following command:
- chmod +x /userdata/bios/pico-8/pico8
- EmulationStation should restart.
- Open the Pico-8 category by navigating to it from the main screen.
- Hit the "Select" button.
- Choose Advanced System Settings.
- Make sure to highlight the Emulator.
- Cycle through the options with the D-Pad until LEXALOFFLE: PICO8 OFFICIAL is chosen.
- Press A after scrolling down until "Back" is underlined.
Knulli Quick Tips
Since Knulli is becoming available for a wide range of devices, there are many reasons to like it. It goes without saying that Knulli's appearance on the TrimUI Smart Pro is a pleasant surprise. We've compiled a few more pointers below to assist you in customizing Knulli on the TrimUI Smart Pro setup.
Connect to WiFi
- Click the Start button from the Main Screen.
- Choose Network Settings by scrolling down.
- Turn on WiFi.
- Enter your password (key) and WiFi network (SSID).
- Select the Back button by highlighting it.
Set Up RetroAchievements
- Verify that you have previously registered for an account on RetroAchievements.
- Click the Start button from the Main Screen.
- Choose Game Settings after highlighting it.
- Choose RetroAchievement Settings by scrolling down.
- Flip the switch for RetroAchievements.
- Put in your password and username.
Install PortMaster
- Go to the category for Ports.
- Run the Install—portMaster script after selecting it.
- Once it has completed its operation, launch PortMaster.
- Download the ports you wish to use.
- If installing a title that isn't "Ready to Run," find and collect the necessary files by following PortMaster's instructions.
- Put the required files in your microSD card's roms or ports.
Add Artwork for Games via Scraper
- Click the "Start" button.
- After scrolling down, choose Scraper.
- Choose between ArcadeDB and TheGamesDB using the D-Pad.
- Navigate to Scraper Settings and adjust as needed.
- Modify the Filters section as necessary.
- After highlighting, choose Scrape Now.
Change Emulator or Core for Specific Games
- Go to the listing of games.
- Hold down the A button.
- Choose Advanced Game Options by scrolling down.
- Ensure that Emulator is in the spotlight.
- To go through the settings, use the D-Pad.
Remove Console Bezels
- Go to the console.
- Click the "Select" button.
- Select Advanced System Options by scrolling down.
- Choose and highlight the decorations.
- Be careful to draw attention to the decoration set.
- Cycle through the options with the D-Pad until you find None.
- Make any further adjustments you would like.
- Press A after scrolling down until Back is highlighted.
Up the Performance
- Go to the game or console.
- Hold down the A button.
- Choose Advanced Game Options by scrolling down.
- Verify that Power Mode is selected.
- Cycle through the settings with the D-Pad until you find High Performance.
Install Knulli Updates
- Verify that the TrimUI Smart Pro has an internet connection.
- Click the Start button on the main screen.
- Select Updates & Downloads by highlighting it.
- Click "Start Update."
If you are experiencing problems and would like to apply updates manually, follow these steps:
Download the most recent version from the Knulli Downloads website on your PC.
- Downloading the TrimUI Smart Pro image is essential.
- After downloading the ZIP file, extract it.
- Put your computer's microSD card in.
- Go to your microSD card's BATOCERA partition.
- Get the boot folder open.
- The boot/batocera.update file from the extracted ZIP file should be used instead of the boot/batocera file.
- Reinstall your microSD card, then switch on your TrimUI Smart Pro.
- The update installation will start automatically.
What Did We Miss?
When you explore the TrimUI Smart Pro's Knulli Settings, you will quickly discover that there is a great deal of customization available. That's one of the reasons Knulli is so fantastic, and we installed it right away when the initial alpha version was made available.
