Making Batocera (& Knulli) Better: Customize Hotkey Shortcuts

Making Batocera (& Knulli) Better: Customize Hotkey Shortcuts
Every year starts with the underdog's customary silent prayer: "Perhaps this year will be our year," if you're the retro gamer who prefers Batocera as their Retro Handheld operating system.
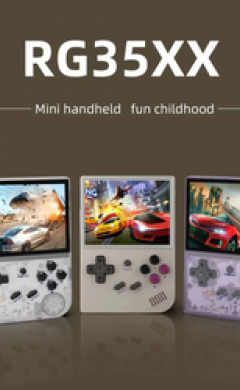
However, 2024 may be Batocera's year. Perhaps everyone's favourite YouTuber, RetroGameCorps, chose Knulli, a fork of Batocera, as his preferred custom operating system for the 35XX Plus, one of his favourite devices of 2024. Or it's our very own Zu, who recently built his gaming console using Batocera. As of the time of writing, TechDweeb had just posted a video in which he called Knulli's contribution to the 35XX series "amazing."
I was drawn to Batocera because of its predictable releases. Because Batocera is more modelled after traditional Linux distributions, it maintains a consistent release schedule, typically releasing once a year. To the best of its ability, it maintains support for all handhelds (for instance, it's the only operating system that still offers updates for my beloved RGB10).
I dislike Batocera because it stubbornly sticks to its hotkey alignment instead of adopting the de facto standard that all other RH Linux operating systems utilize. This is even mentioned by RetroGameCorps when he suggests Batocera for the 35XX series.
This guide helps players change the Batocera hotkeys to suit their tastes. It ought to apply to all Batocera forks, including Knulli.
Other Linux Operating Systems and the Defacto Hotkey Standard: A Brief History
Like many others in the community, I used the 351ELEC on the RG351P for my first EmulationStation encounter. The primary Linux custom operating systems at the time were 351ELEC and ArkOS, which employed comparable hotkey configurations for functions like accessing the RetroArch menu and altering save states. With the hotkey alignment staying the same, 351ELEC changed to AmberElec, split into JelOS and ROCKNIX. EmuDeck, which used the exact hotkey alignment as 351ELEC, was released after the launch of the Steam Deck, our lord and saviour. It establishes a de facto standard we will adhere to to the best of our abilities.
The Limitations
Similar to JelOS, AmberElec, and other similar systems, universally defined hotkey shortcuts are only functional in RetroArch-emulated computers. These reconfigurations, therefore, impact consoles that depend on standalone emulators, such as Dolphin for GameCube and PPSSPP for PSP.
Additionally, to make our lives easier, we will only use the joypad, start, select, and the four face buttons, L1 and R1, and we will not set shortcuts to any analog buttons. JelOS shortcuts map rewind and fast forward to L2 and R2; instead, we'll bind them to the joypads left and right.
The Text Files
To finish the hotkey adjustments, we must access two text files located on the Share partition of the Batocera installation. This partition is usually an ext4 partition, which prevents the SD card from being accessed on a Windows device without further software. Nevertheless, users of Batocera probably have previously used this to move ROMs. I prefer to use my Steam Deck in desktop mode. If a Steam Deck is unavailable, the Batocera Wiki's network connection instructions are accessible here.
Retroarchcustom.cfg, which may be found at the following location, is one of the two files we will require access to: The files are found at Share--> System -> batocera.conf and Share--> System -> Config -> Retroarch -> retroarchcustom.cfg.
If something goes wrong, I strongly advise creating backups of both files before opening them.
Why two files?
It all boils down to Batocera's methodology. Meanwhile, Batocera centralizes the management of universal settings through the EmulationStation front (the settings are edited through the EmulationStation start menu) and saves them in Batocera.conf, RetroArch configurations are stored in retroarchcustom. Cf. At boot up, the current Batocera settings would replace any modifications we made to retroarchcustom. Cf. The button numbers must be copied from an existing source of information, like retroarchcustom.cfg, because the button mapping in Batocera varies depending on the build (for example, the x86 build has different mappings to the Steam Deck or RG552 builds, and all Knulli builds will have their button mapping).
Please refer to the two examples below. Retroarchcustom.cfg is seen on the right image on a Steam Deck running Batocera and on the left image on a TrimUI Smart Pro running Knulli. Input codes like input_player1_a_btn (the A or X buttons on a PS controller) are entirely different.
Getting the Button Mapping Information
As we previously stated, the button mappings are located in the file Share -> System -> Config -> Retroarch -> retroarchcustom.cfg.
Save this duplicate on the computer you'll use to modify the text files instead of opening it on an SD card or network share.
When you open this file, a lengthy text list should appear beginning with "menu_driver = ozone."
We are looking for a list of text that begins with "input_player1"; the first line should read "input_player1_a_btn." The information we require is located close to the bottom.
The four joypad directions—A, B, X, Y, Start, Select, L, and R—need to be noted, with L and R standing for L1 and R1, respectively. You can disregard anything that initiates "input_player1_gun."
You'll need to mentally translate because the Button Mapping adheres to the Nintendo layout: the A button here is equivalent to the Circle button on a PS controller and the B button on an Xbox controller.
I've bolded the outputs that require our attention using the TrimUI Smart Pro's output as an example. Note that the production for the joypad buttons can be either a pure number, like 12 (which is what the Steam Deck output is), or a joypad direction, like the example below, depending on the device.
input_player1_a_btn = 1
input_player1_b_btn = 0
input_player1_x_btn = 3
input_player1_y_btn = 2
input_player1_l_btn = 4
input_player1_r_btn = 5
input_player1_l2_axis = +2
input_player1_r2_axis = +5
input_player1_start_btn = 7
input_player1_select_btn = 6
input_player1_gun_aux_a_btn = 1
input_player1_gun_aux_b_btn = 0
input_player1_gun_aux_c_btn = 2
input_player1_gun_offscreen_shot_btn = 4
input_player1_gun_trigger_btn = 5
input_player1_gun_start_btn = 7
input_player1_gun_select_btn = 6
input_player1_up_btn = h0up
input_player1_gun_dpad_up_btn = h0up
input_player1_down_btn = h0down
input_player1_gun_dpad_down_btn = h0down
input_player1_left_btn = h0left
input_player1_gun_dpad_left_btn = h0left
input_player1_right_btn = h0right
input_player1_gun_dpad_right_btn = h0right
Adding Text to the Config File
Once this information is copied down (I copy it to a text file, but some retro individuals might use a pen and paper instead), we are done using retroarchcustom. cfg.
Our focus must now be Share- > System -> Batocera.conf.
As previously stated, I strongly advise creating a backup of these files before proceeding, which can be restored if something goes wrong. Additionally, I suggest working on a locally saved copy on your PC. After editing, you can save this file to the Batocera portable. A pure text editor, such as TextPad on Windows or TextEdit on Mac, should always be selected when a computer asks which program to use to open a file.
This is how batocera.conf should appear when you open it. We want to add text at the bottom of the text file, with a list of user-defined configurations, like the Wi-Fi network name and password (stored in plain text, so try not to think about that too much).
Customize For Your Device
I have typed out the generic configuration language that must be placed to the bottom of batocera.conf. Edit the text below to include the appropriate button codes for your device so that it will function. I've enclosed the button name in square brackets (for example, []) as holding text; substitute the number or joypad direction code for this.
For instance, the sentence "global.retroarch.input_fps_toggle_btn=[Y button]" would be changed to "global.retroarch.input_fps_toggle_btn=2" using the TrimUI Smart Pro setup details in the section above as an example.
The text to be edited and then copied into the configuration file is as follows:
global.retroarch.input_ai_service_btn=nul
global.retroarch.input_screenshot_btn=nul
global.retroarch.input_shader_next_btn=nul
global.retroarch.input_shader_prev_btn=nul
global.retroarch.input_disk_eject_toggle_btn=nul
global.retroarch.input_exit_emulator_btn=[Start Button]
global. retroarch.input_menu_toggle_btn=[X Button]
global. retroarch.input_fps_toggle_btn=[Y Button]
global. retroarch.input_pause_toggle_btn=[A Button]
global. retroarch.input_reset_btn=[B Button]
global. retroarch.input_state_slot_increase_btn=[Joypad Up]
global. retroarch.input_state_slot_decrease_btn=[Joypad Down]
global. retroarch.input_save_state_btn=[R Button]
global. retroarch.input_load_state_btn=[L Button]
global. retroarch.input_hold_fast_forward_btn=[Joypad Right]
global. retroarch.input_rewind_btn=[Joypad Left]
Once the modifications have been made, save the files and move them back to the Batocera SD card. Note that Windows' TextPad may occasionally attempt to rename the file to "batocera.conf.txt." Simply rename the file back to batocera.conf if this occurs.
Further Reading
As previously stated, Batocera appeals to me because, in contrast to most Retro Handheld custom OSs, it is administered more like a typical Linux distribution. One of its advantages is its comprehensive wiki. Most of what I've discussed in this post was made possible by the material in that wiki, which is available here and is a fantastic resource for anyone interested in learning more about Batocera's internal operations.
Similar to several of the scenes, RetroGameCorps introduced me to Batocera. However, I became interested in adding more setup to my Batocera installs after seeing another YouTuber, Batocera Nation. Additional emulators or PC game stores (like the Epic Store) can be added to ordinary Batocera builds, and they have a ton of simple-to-follow instructions.
