Retroid Pocket 5 (and Mini) Tips and Tricks!
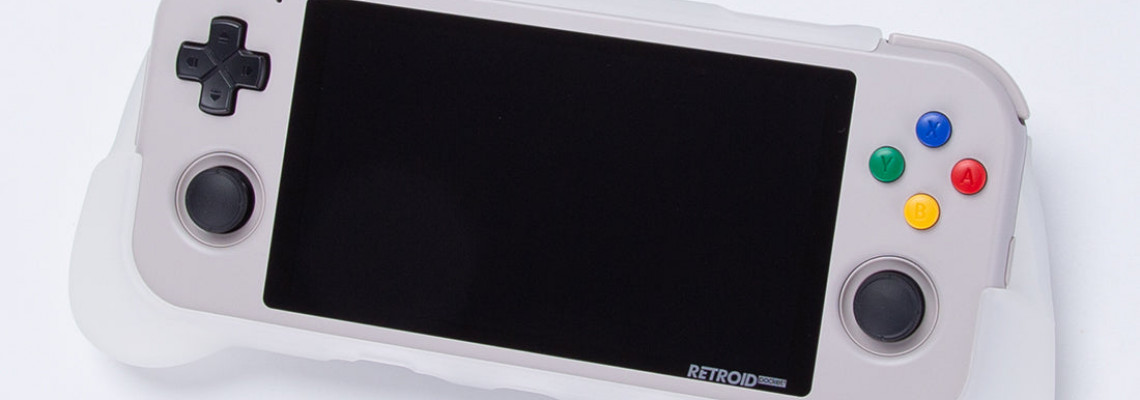
Retroid Pocket 5 (and Mini) Tips and Tricks!
Retroid fans, this is for you.
To everyone celebrating, have a happy Christmas! Since it was sent to me a month ago, I have been using this device daily, which has taken our writing staff by storm. Spoiler alert: It's undoubtedly my favourite handheld of the year. You can read our complete review here.
I want to spare you, the reader, the hours of trial and error that came with setting this up and personalizing it over a month. Here are some pointers for the Retroid Pocket 5. (To accompany our official setup guide, go HERE.) This is the first of two parts, so check back soon.
Exterior Mods
Ergonomics
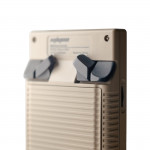
To cut to the chase, gripping this console is not comfy. A profusion of 3d-printed console scratching abominations from Etsy might fix this in the future, but for now, I suggest purchasing some grip stickers. I put this brand in the areas depicted in the picture using my hand on the gadget.
Less resistance can stop your hand from cramping, but it won't alter how the device fits in your hands. Extra bumpers keep your glazed nugget from tumbling off the table and breaking on the hard floor.
Button Noise
It's worth it if you can tolerate console mutilation, but it's more intrusive. RH alumnus Aish of Aish Talks Tech created a modification that drastically lowers button noise by cutting off a portion of the rubber membrane and putting tape behind the shoulder buttons. He demonstrates it on the RP Mini, but the procedure is the same. I'm a *checks dictionary* coward, so I didn't do it on mine. This audacious and brazen video is available online.
Developer Mode
This is what you'll desire. It gives you many options that you should use to make some of the following adjustments. To access "Become a developer," navigate to Settings, select "About Handheld Console," and then tap "Build Number" seven (7) times. System Settings contains developer options. In developer mode, you can make the following adjustments:
OEM Unlocking
This option launches your RP5's bootloader. This is utilized when rooting your smartphone, which, I assume, will nullify your one-year Retroid warranty. While unlocking the bootloader is acceptable, it may cause issues with web-based applications such as Remote Streaming and Netflix. If you're not trying to root, I would leave it off.
Animation Scale
These adjustments will impact the time Android UI elements take to finish a transition animation. Even though it might seem useless, turning these off helps your battery last a little longer.
Override Force-Dark
With this setting, every application's user interface is forced into dark mode. Playing games in the dark will move the floating symbol into the dark mode, preventing you from being blinded by white light.
Force 4x MSAA
This will post-process a 4x anti-aliasing filter for OpenGl material. This could be useful if you prefer to remain with the less complicated Opengl graphics driver, even though I advise adopting Vulkan wherever possible.
Although many more developer options are available, these are the safe standouts.
Display Tweaking!
This section is for you if, like me, you are a total screen junkie who cares about brightness and colour accuracy. The RP Mini's overly saturated colour scheme and lack of any display adjustments drew harsh criticism from me. Hopefully, we all remember Jersey Shore and Kirby, and this time we have choices! We can change the temperature! We are still a little oversaturated. However, it's far superior! You should also make use of a couple more possibilities. These adjustments are all found in Settings and Display.
- Screen timeout: This impacts how long it takes for your screen to turn off.
- Dark theme: A dark theme.
Colors
Three options are available here: Standard, Screen Enhancement, and Intelligent Environment Adaptation. After selecting Intelligent Environment Adaptation and Cool as the colours, I would go to bed.
Screen Enhancement ruins your image and blows up the colour because the display is somewhat redshifted on Standard (yikes).
Graphic Drivers (Made Easy)
Emulators utilize graphics drivers to convert raw graphical data from the emulator to your device without becoming too technical, to avoid using too much space. For the majority of emulators, there are three common ones: "Software" (Raw data without external graphics drivers), Vulkan (a more recent but more effective standard), and Opengl (a universal and older Standard). These are essential for maximizing graphics fidelity, precision, and performance in 3d games.
While Vulkan, its wild younger cousin, offers higher performance and response times in exchange for less compatibility (depending on your version), Opengl, being the oldest, has the widest compatibility coverage. By default, the Retroid Pocket 5 runs Vulkan 0.3, a pretty early version of Vulkan, and OpenGL 3.
I recommend turning on Vulkan as a catch-all for your emulators and switching to OpenGL when compatibility is poor. For a noticeable performance increase, enable Backend Multithreading whenever feasible (usually in Advanced options, e.g., Dolphin and Aether).
Mesa Turnip Drivers
While you may have heard about these in videos and in passing in our RP5 setup guide, you may not know how to put them into practice. These drivers update your system drivers to the most recent versions. That's all you need to know, albeit there is more subtlety. You will typically notice more realistic emulation and, in some circumstances, greater speed, but these don't do miracles because your system is still bottlenecked.
Based on my testing, the best Turnip driver for the RP5/Mini is v24.3.0 Revision 9v2. By updating the Vulkan version to 1.3.296, this driver should resolve any rendering problems caused by stock Vulkan. Switch those to OpenGL, and you'll be OK. However, this driver can also negatively affect performance in games like The Legend of Zelda: Wind Waker. Navigate to Graphics, Graphics drivers, and then pick the entire ZIP file from the GitHub link in Dolphin. That's all.
Docked Mode
It can be unpleasant to dock to a TV. It's not difficult, and you'll be ready for half of the process if you go to Settings, Handheld Settings, Connect to TV, and turn everything on. The real HDMI-out procedure and appropriate controller configurations are what get irksome. I'll save you time on those, then.
HDMI-out
The simple solution is to purchase Retroid's dock from the official website, plug it in, and remove this article from your browsing history. Unfortunately, any alternative can differ significantly. You are forced to use the highest resolution your circumstances will allow, since you cannot adjust the console's resolution while it is docked. The majority of HDMI-out solutions can get up to 4K/30Hz.
Why? It's magic.
Using a 4K/60 fps HDMI cable with my Skull and Co Switch Dock proved a successful solution. The maximum output of 4K/60fps is achieved, which is excellent because 30fps would add significant input latency and limit your frame rate. For optimal compatibility, update the firmware on the dock itself whenever you can. Using the same wharf as your switch is another benefit of this arrangement. Well done.
Controller
This is quite subtle. You'll want a controller that does its job. I'll tell you what doesn't work now:
- 2.4GHz dongles are not very effective. The latency is unplayable and ridiculously high.
- Not all Android apps support Switch Pro controllers; instead, use an X or D input device. The Switch 8BitDo Ultimate Controller is, therefore, a simple write-off.
Anything else is what works. After the 1.1 latency upgrade, I use my GuliKit King Kong 3 Max and my spare DualSense (PS5) controller with Bluetooth (yeah!). These days, there is hardly any latency, and it simply functions. The Skull and Co. dock also allows you to connect a controller directly.
All right, that's it. Get lost.
