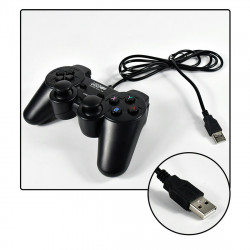
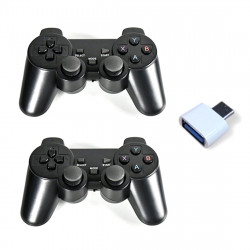
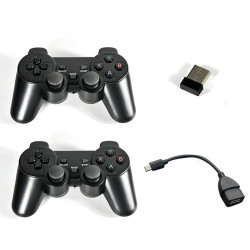
Powkiddy
Best retro handheld emulator consoles: Anbernic, Ayn, Miyoo & more
The best retro handheld consoles
1. Anbernic RG556
Anbernic, Pexels
- CPU: Unisoc T820 CPU
- Graphics: Quad Core Mali G57
- RAM: 8GB LPDDR4X
- Storage: 128GB
- Display: 5.4-inch AMOLED screen
- Operating System: Android 13
- Weight: 330g
The main benefit of the Anbernic RG556 is its remarkable specifications. It has a big battery, 8GB of RAM, and a Unisoc T820 CPU. This indicates that it can handle emulation of almost anything up to the time of the PlayStation 2.
Even challenging platforms like the Saturn can be emulated using the Anbernic RG556, albeit not all games will function properly. The Anbernic RG556's 5.4-inch AMOLED screen, which displays everything in incredibly clear resolution, is its most notable feature.
The Anbernic RG556's drawback is that its user interface can be confusing and frequently takes a lot of tweaking to get perfect.
2. Ayn Odin 2
- CPU: Qualcomm Snapdragon 8 Gen 2
- Graphics: Adreno 740 GPU
- RAM: Up to 16GB
- Storage: up to 512GB
- Display: 6-inch IPS touchscreen
- Operating System: Android 13
- Weight: 420g
With its cutting-edge Qualcomm Snapdragon 8 Gen 2 processor, the Ayn Odin 2 packs a lot of power. It has all the capabilities of the Anbernic RG556 and more. Although it isn't as small and ergonomic as the Anbernic RG556 or other gadgets on this list, it is still very comfortable to use, and most people should be able to use its Android interface.
The cost of the Ayn Odin 2 is its main drawback. Given that the base model costs $299, it's a little hard to argue that its primary use will be that of a vintage emulator.
3. Analogue Pocket
- CPU: Altera Cyclone V, Altera Cyclone 10
- RAM: 32MB
- Storage: Expandable via MicroSD
- Display: 3.5-inch LCD
- Operating System: Analogue OS
- Weight: 275g
Analogue's name was established by providing hardware emulation of exceptional quality and accuracy. Analogue gadgets use "FPGA" to replicate the gaming experience, while many contemporary devices rely on software emulation devices.
The inside circuitry can act more like the electronics present in vintage systems thanks to FPGA, or field programmable gate array. This enhances the emulation's quality for a more realistic experience.
Because it could mimic the Game Boy, Game Boy Color, and Game Boy Advance and play cartridges designed for those systems, the Analogue Pocket was very popular when it initially came out.
Although the $220 price tag may turn off some buyers, the build quality and compatibility with original cartridges are sure to draw in a large number of customers.
4. Evercade EXP
Evercade
- CPU: 1.5GHz ARM Cortex A7 SoC
- RAM: 4GB
- Display: 4.3-inch IPS screen
- Operating System: Custom Linux
- Weight: 270g
In terms of game emulation, the Evercade line of handhelds has a slightly different approach. The device uses cartridges rather than a variety of game ROMs built into it. Users can acquire physical media and trade and lend out games using this nostalgic technique, just like in the good old days.
The Evercade currently offers well over 300 games, all of which have official licenses. Because Evercade has received approval from a wide number game developers, including Atari, Capcom, and Namco, users of the Evercade EXP won't ever have to worry about a lawsuit bricking their device.
The Evercade EXP's construction quality has been commended, and it features two modes—horizontal and vertical—which is uncommon for mobile devices.
5. Miyoo Mini+
- CPU: ARM Cortex A7
- RAM: 128MB
- Storage: MicroSD card up to 128GB
- Display: 3.2-inch IPS screen
- Operating System: Linux
- Weight: 162g
The Miyoo Mini+ is a strong candidate if you're looking for something that's really portable and fits in your pocket or bag while you're out and about. It received good scores during our review for a reason.
Despite its small size, it has respectable specifications, including a 3000mAh battery, a 1.2GHz CPU, and 128MB of RAM.
It features a great screen that can display a surprisingly wide variety of games with sharp, clear images. It works especially well with games from the Game Boy range, and there aren't many worse things to do than play Golden Sun while you're waiting for a train.
Interestingly, it is incredibly adaptable and reasonably priced, capable of handling anything up to the PlayStation 1 period.
6. Retroid Pocket 2S
Retroid, Pexels
- CPU: ARM Cortex-A7
- Graphics: Mali-400 MP2
- RAM: 1GB
- Storage: 8GB (option for microSD card expansion)
- Display: 3.5-inch IPS
- Operating System: Android 8.1
- Weight: 196g
The Retroid Pocket 2S is a really large-looking gadget that hides a powerful device. In addition to handling a large selection of PSP titles, it can quite successfully simulate anything up to the Dreamcast and GameCube.
Despite its low price , it boasts some beautiful high-end features including new shoulder buttons and Hall Effect analog sticks. The RAM can also be upgraded to 4GB for an additional $20, which is an excellent investment.
7. Anbernic RG35XXSP
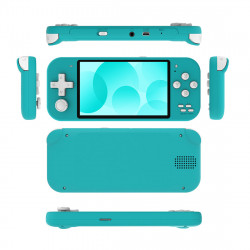
Powkiddy RGB30 Setup Guide
Recommended Accessories
- Samsung 128GB – for the second slot for an SD card.
- SanDisk 64GB – Regarding the initial SD card slot.
- UGREEN SD Card Reader – Excellent choice for an SD card reader.
- HDMI Out: UGREEN HDMI to Mini HDMI Cable (an HDMI cable is still required)
What is ArkOS?
In this tutorial, we'll install ArkOS, a customized firmware for the RGB30. ArkOS has a strong community and a far better operating system than the one with the device.
Before we begin, you must always have a high-quality, branded SD card and reader. The device's stock SD card should be thrown away rather than used. This also applies to the ROM SD card; if you are here after purchasing the device, discard it, and if you are here before, do not purchase it. In addition, these SD cards are low-quality and unbranded, which makes them more likely to malfunction. The ROMS have numerous problems and are of poor quality. One major issue that irritates Pokemon lovers is the inability to store progress. I'll also teach you how to locate ROMs in the most subtle way possible. Whether you want to use a single SD card or two will determine the quality of the SD card and reader. The 128GB SD card mentioned above is the ideal choice if you want one, but if you're using two cards, a 64GB card and the same card for ROMs make a fantastic combo. It's up to you whether you want one or two SD cards; if you're on a tight budget, use one.
A suitable, branded SD card reader is also required. These choices are all directly above.
ROMs & BIOS Library
Your BIOS library and ROM are the final things you need. You can download a ROM pack called the Tiny Best Set if all you want is an extensive list of games, which you can then choose which ones to play. A comprehensive, carefully selected list of BIOS files and ROMs is included with this bundle. For convenience, you should download the following filenames on a 128GB card: tiny-best-set-go-games.zip + tiny-best-set-go-expansion-64-games.zip + tiny-best-set-go-expansion-128-games.zip. Don't worry about that too much; we can obtain the artwork by scraping it in ArkOS. After extracting all those zip files to one location, you should have several BIOS and ROM folders. You will be responsible for finding other venues using Google, Reddit, or other resources if you desire more than what is offered in this package.
PICO-8
Pico-8 rooms, part of ROMS, are USD 14.99 if you want them. I'll demonstrate how to obtain these first, and then how to add them afterwards. Click the download button after visiting the Pico-8 page at lexaloffle.com/pico-8.php. Select "Get Pico-8." All you have to do now is check out, so enter your email, pay using PayPal, Amazon, or your credit card, and proceed. An email stating that your Pico-8 order is ready will be sent to you; click the link to access a page where you can download your products. The necessary zip file should be downloaded after selecting the Linux tab and pressing the Raspberry button.
These are the files required to get Pico-8 operating. We may obtain a Picowesome collection from Reddit for games like the Tiny Best Set. All we need to do now is click the download link.
All right, your ROMS, BIOS files, SD card, and SD card reader are ready to use. Let's proceed.
Software Needed
The two pieces of software that we require are Rufus and 7-Zip. Visit the Rufus.ie website to download the portable Rufus tool. This will assist us in formatting our SD card as FAT32, particularly if it is larger than 32GB. To prevent problems, use Rufus instead. Download the exe that corresponds to your Windows version—likely the 64-bit version—from the 7-Zip website.
We will also get the RGB30 image from the ArkOS Wiki. Get it via the Mega link or GDrive. After downloading it, extract the zip file using 7-Zip. Remember to extract it; we need the picture file within.
Imaging with Rufus
Use the SD card reader to connect your SD card to the computer. For the people doing two cards, this is for the operating system card.
Please verify that the device indicated in Rufus is the SD card you connected; it should be the same size as the disk. Click Select on the right, then pick the image file by navigating to the folder you extracted from the ArkOS package. Click Start and leave everything else as it is. Click yes to any popups.
Check on some loved ones; this will take some time.
From now on, when you place the image on the SD card, you will see Windows popups stating that the card is not formatted, that there are partition issues, or something similar. Ignore all that; if you format the card after all of this, you will have to start over. Windows doesn't know how to manage a FAT32 card.
Once Rufus is done, you can safely eject the card using the taskbar. Then, you want to put it into the TF-OS slot in your device while it's powered off. Next, turn the gadget on. Don't do anything and let it do its thing; it will reboot twice.
You will know you are ready when you see the EmulationStation menu. Push Start, go to quit, and shut down the system.
We must now upload our BIOS and ROMS files. The following stage will determine whether you use the one-card or two-card methods. The one-card method can skip this next part, as I will show you how to get a second card working.
Two-Card Method Only
Connect your second SD card to your computer using the SD card reader. Please verify that the device indicated in Rufus is the SD card you connected; it should be the same size as the disk. Now select Non-bootable under boot selection. Next, verify that the file system is FAT32 or Large FAT32 by looking toward the bottom. Click Start. To get started, click "yes" to all of the cautions that may appear about partitions, data, etc. Your second SD card will be formatted as FAT32 and should be speedy. After it's finished, safely eject the card and place it in slot TF-GAME. With the device turned off, ensure the OS card is also in TF-OS. After turning the device on, select the Options tab Advanced and SWITCH TO SD2 FOR ROMS. After that, the folder structures for the second SD card are set up, and we are ready to go. Press the start button, select Quit, and shut down the system.
Both Methods
If you have a single or dual card, plug your SD card back into your computer. If using the two-card technique, use the second SD card for ROMS. If you're using the single card technique, you should notice an EASYROMS partition in File Explorer. Navigate to there. Otherwise, if this is your second SD card labelled to whatever you previously configured in Rufus, all you'll see are ROM folders. If not, assign a letter to that partition by opening disk management. At this point, these are the platform folders where you can store your BIOS and ROMS. You should now take your BIOS and ROMS files from the Tiny Best Set collection that we previously obtained and place them in the appropriate location. The folder names don't match many, so move the ROM files from the Tiny Best Set folders to the appropriate spot on the EASYROMS partition. The emulator page on the ArkOS wiki will tell you which platform is which, along with the proper file types and BIOS required for each platform if you need help figuring it out.
In case you are interested in Pico-8, you should unpack the zip file we downloaded and transfer the Pico8, Pico8_dyn, and Pico8.dat files from the Lexaloffle website to the Pico-8 roms folder on your SD card. After that, extract the Picowesome zip file, take everything from the Picowesome Pico8 folder, and place it all in the carts folder in the SD card's Pico-8 ROMs folder. Go ahead and replace any files that are requested.
After transferring all that, safely detach your card and replace it with the device turned off. When using two cards, the operating system card must always be in slot TF1 for the computer to boot up correctly, and your game card should be in slot two.
All your games should be installed and operational when you turn the device on.
Artwork
However, let's post some artwork here. In the settings, advanced section, turn on your wifi. After it sends you back, return it here and select wifi. After configuring your wifi, press Start to return to the main emulationstation menu. Proceed to Scraper. You should now create an account on the screenscraper website, then return here and fill out the necessary information. The remaining choices are up to me; I'll turn off ratings and videos as I don't need or want them. Box 2D is used as the picture source for real box art. When you're prepared, click "Scrape now." You can choose which systems to scrape or the entire system. When you're ready, click "Start," and I'll take care of the rest.
Retro Achievements
Enabling Retro Achievements is another thing to demonstrate. For those who don't know, old games include achievements, which is fantastic. Thus, we want that functionality. We'll need your login and password, so if you still need one, go to the Retroachievements website and create one. When you select Retroarch from the device's main menu, two instances of Retroarch will appear. The steps are the same, and we must log in on both. Launch one, select Settings > Achievements > Enable Achievements, and then fill in each field with your account and password. Next, return to the main Retroarch menu, select Configuration, and then select Save Configuration. Then give up retroarch. For Retroarch32, repeat these instructions once more.
Button Mapping
About research, I should be aware of a few parameters that aren't enabled. First, for some reason, fast-forward isn't mapped. To fix this, let's go to settings, input, and hotkeys, choose the fast-forward toggle, and set it to R2. Additionally, let's set the display FPS to Y. Because SELECT is our hotkey button; we must press SELECT + these hotkeys to activate these actions. To avoid having to press start+select twice to end a game, back out one menu and disable confirm quit. Let's go back out and start saving now. Enable autosave state if you would like Arkos to do so, as it does not now do so when you quit.
Similarly, when you load a game, the save state is not loaded automatically; if you like that, you can enable it. I desire both. To return to the main Retroarch menu, back out twice. Then, select a setting and save the current setting. After quitting Retroarch, follow these identical instructions again for the other version of Retroarch.
Themes
Press Start from the Arkos main menu, then UI settings, and you'll see a list of themes. If you want to alter your theme, go to the Arkos Wiki for information on how to add more.
Remote Services
Go to settings and turn on remote services to load your games from a distance. Next, enter that IP address in any web browser connected to a local network. Lowercase "ark" is the default password and username for both. You can now do everything you want with the files on the ROM card, including uploading, downloading, and deleting them. This is incredibly helpful for adding games to your device from a distance.
Updating ArkOS
Finally, how is ArkOS updated? It's straightforward. After selecting Options, you scroll down to Update. When you click it, a warning about the script not terminating will appear; click okay, and then you must write okay. After that, put it down and let it update.
Now, start playing games and enjoy yourself. That's all you need to accomplish for everyday use, which was the guide's primary focus. Once you're up and going, everything is at your discretion.
Powkiddy V10 Setup Guide
Recommended Accessories
- Samsung 128GB – for the slot for an SD card.
- UGREEN SD Card Reader – Excellent choice for an SD card reader.
- Wi-Fi Adapter – Wi-Fi is not built in; you'll need this plus the adaptor below to access it.
- USB-C Adapter for Wi-Fi Adapter – necessary for the Wi-Fi adapter mentioned above.
What is ArkOS?
In this tutorial, we'll install ArkOS, a customized firmware for the Powkiddy V10. Although the gadget comes with it, we'll install a far better and more recent version.
Before we begin, you must always have a high-quality, branded SD card and reader. The device's stock SD card should be thrown away rather than used. In addition, these SD cards are low-quality and unbranded, which makes them more likely to malfunction. The ROMS have numerous problems and are of poor quality. One major issue that irritates Pokemon lovers is the inability to store progress. I'll also teach you how to locate ROMs in the most subtle way possible. Although any name-brand 128GB SD card will work, the Samsung Evo 128GB is the best choice for a high-quality SD card and reader. I also strongly recommend the UGREEN SD card reader, which I have used for years. An SD card reader is required to connect to your computer.
A suitable, branded SD card reader is also required. These choices are all directly above.
ROMs & BIOS Library
Your BIOS library and ROM are the final things you need. You can download a ROM pack called the Tiny Best Set if all you want is an extensive list of games, which you can then choose which ones to play. A comprehensive, carefully selected list of BIOS files and ROMs is included with this bundle. For convenience, you should download the following filenames on a 128GB card: tiny-best-set-go-games.zip + tiny-best-set-go-expansion-64-games.zip + tiny-best-set-go-expansion-128-games.zip. Use a tool called JDownloader or the torrent option if your downloads take too long.
After extracting all those zip files to one location, you should have several BIOS and ROM folders. If you desire more than what is offered in this package, you will be responsible for finding other venues on your own using Google, Reddit, or other resources.
All right, your ROMS and BIOS files, along with your SD card and SD card reader, are ready to use. Let's go on.
Software Needed
The two pieces of software that we require are Rufus and 7-Zip. Visit the Rufus website, where you can download the portable Rufus tool. This will assist us in formatting our SD card as FAT32, mainly if it is more significant than 32GB. To prevent problems, use Rufus instead. Download the exe that corresponds to your Windows version—likely the 64-bit version—from the 7-Zip website.
We will also obtain the OGA 1.1/RGB10/RGB10s/RGB20 image from the ArkOS wiki. Yes, we have a V10, but we can readily use an image that isn't specifically made for our device. Get it via the Mega link or GDrive. After downloading it, extract the zip file using 7-Zip. Remember to extract it; we need the picture file within.
Imaging with Rufus
Use the SD card reader to connect your SD card to the computer.
Please verify that the device indicated in Rufus is the SD card you connected; it should be the same size as the disk. Click Select on the right, then pick the image file by navigating to the folder you extracted from the ArkOS package. Click Start and leave everything else as it is. If any popups appear, click "yes."
It will take some time, so go check on some loved ones.
From now on, when you place the image on the SD card, you can see Windows popups stating that the card is not formatted, that there are partition issues, or something similar. Ignore all that; if you format the card after all this, you will have to start over. Windows doesn't know how to manage a FAT32 card.
After Rufus is finished, you can use the taskbar to safely eject the card. Then, you should insert it into the device while it is turned off. Next, turn the gadget on. Don't do anything and let it do its thing; it will reboot twice.
You will know you are ready when you see the EmulationStation menu. Press the start button, select Quit, and shut down the system.
We must now upload our BIOS and ROMS files.
Adding ROMs & BIOS
Reconnect your SD card to the computer. Navigate to the EASYROMS partition, which should be visible in the file explorer. If not, assign a letter to that partition by opening disk management. At this point, these are the platform folders where you can store your BIOS and ROMS. You should now take your BIOS and ROMS files from the Tiny Best Set collection that we previously obtained and place them in the appropriate location. The folder names don't match many, so move the ROM files from the Tiny Best Set folders to the appropriate spot on the EASYROMS partition. The emulator page on the ArkOS wiki will tell you which platform is which, along with the proper file types and BIOS required for each platform if you need help figuring it out.
After transferring all that, safely detach your card and replace it with the device turned off.
All your games should be installed and operational when you turn the device on.
Hotkeys
Let's start with hotkeys. The Plus button and the dpad move the screen's brightness up and down. The Plus button and the left and right pads change the volume. We use the Minus button for in-game hotkeys, so let's take care of those first.
Button Mapping
When you select RetroArch from the main menu, two instances of RetroArch will appear. The steps are the same, and we must log in on both. After opening one, go to Settings, Input, and Hotkeys, and then choose Fast Forward Toggle to make it R2. Let's also use the Y button to store slot shifting, screenshots, and various hotkeys, like Reset. Let's set Show FPS to Y as well. Since Minus is our hotkey button, we must press it with specific hotkeys to activate these features. Minus+Start is used to end a game. To avoid pressing Minus+Start twice to end a game, back out one menu and disable Confirm Quit. Let's go back out and start saving now. If you want ArkOS to save your state automatically when you quit, you must set AutoSave State.
Similarly, when you load a game, the save state is not loaded automatically; if you like that, you can enable it. I desire both. To return to the main RetroArch menu, back out twice. Then select Configuration and Save Current Configuration. After quitting RetroArch, follow these identical procedures for the other version of RetroArch.
Change GBA Core (faster speed)
You may encounter games that don't function well with the default mGBA core because you most likely purchased it for the GBA. Here's how to make it different: Switch the core to gPSP, switch Auto to RetroArch, and press Start on the home screen, Emulator Settings, and Nintendo—GBA. That's it!
Themes
Select Start from ArkOS's main menu to switch your theme, then UI Settings. A selection of themes will appear. The ArkOS wiki has information on how to add more.
Postmaster
We also have something called PortMaster for people who prefer playing different games. If you're interested in games you can port over, check out my tutorial here. It's more involved and would take up a lot of space in this post.
Adding Wi-Fi
It would help if you first had this Wi-Fi adapter.
This USB-C adapter is then required.
Connect them both before connecting them to the OTG port on top of the device (the one on the right if you're looking at it directly).
In ArkOS, select the Plus symbol at the bottom using the trigger after going to Options, Wi-Fi. Then, select your password after choosing your Wi-Fi network.
To exit, use your triggers and press the X button.
Update ArkOS (Wi-Fi Needed)
Navigate to Options and turn on Remote Services. A blinking cursor will appear for a minute, followed by text stating that remote services are being enabled. Once this is finished, you will be sent back to the Options panel. Go to Update after that. A warning about not halting the script will appear; click "Okay," and then you must type "Okay." After that, let it update and put it down
Artwork (Wi-Fi Needed)
At the home screen, press Start. Proceed to Scraper. You should now create an account on ScreenScraper's website, return it here and fill out the data. The remaining choices are up to me; I'll turn off ratings and videos as I don't need or want them. Use Box 2D as the Image Source to create real box art. When you're prepared, click Scrape Now. You can choose which systems to scrape or complete the process. When you're ready, click "Start," and I'll take care of the rest.
Retro Achievements (Wi-Fi Needed)
You can skip this to avoid utilizing the Wi-Fi adaptor because it is necessary. We'll need your login and password, so if you still need one, go to the RetroAchievements website and create one. When you select RetroArch from the device's main menu, two RetroArch instances will appear. The steps are the same, and we must log in on both. Launch one, select Settings, Achievements, Enable Achievements, and then fill in each field with your username and password. Next, return to the RetroArch main menu, select Configuration, and then select Save Current Configuration. Next, end RetroArch. For the other RetroArch version, follow these procedures once more.
Now, start playing games and enjoy yourself. That's all you need to accomplish for everyday use, which was the guide's primary focus. Once you're up and going, everything is at your discretion.
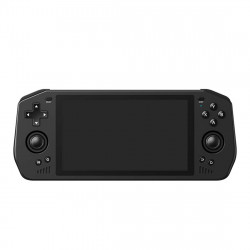
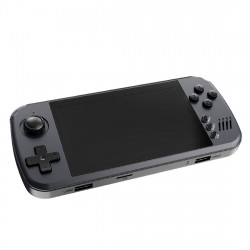
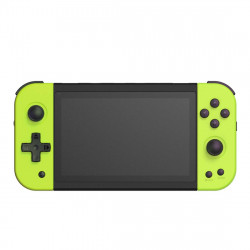
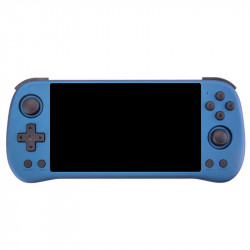
Powkiddy X28 Setup Guide
Recommended Accessories
- MicroSD Card: 128GB or 256GB
- MicroSD Card Reader: UGREEN SD Card Reader
- Charger: UGREEN 65W Charger
Initial Setup Guide
- Prepare an SD Card: You can prepare your SD card in advance. Follow the instructions on this page to receive everything you need before receiving your gadget.
Recommended Settings
- Play Store: Log in to the Play Store and do any app updates.
Recommended Emulators
To keep some of these emulators, like Vita3K and RetroArch, current, you should use Obtainium.
RetroArch – PS1 & Under – Nightly (RetroArch_aarch64.apk)
You should use the Nightly build, not the one from the Google Play Store, for RetroArch. RetroArch will be your go-to emulator for anything under and including the Sony PlayStation 1.
M64Plus FZ Pro – Nintendo 64
Regretfully, many games on RetroArch for the Nintendo 64 are broken on Android. Unfortunately, there is no other way to activate Retro Achievements. Some titles, like Super Mario 64 and Ocarina of Time, function flawlessly, but the majority will have several texture problems and more (Mario Golf, Pokemon Snap, etc.).
The premium version of M64Plus FZ Pro is preferable to the free one, and you should use it from the Google Play Store.
PPSSPP – Sony PlayStation Portable
The Google Play Store's PPSSPP is the most excellent Android emulator for simulating the Sony PlayStation Portable. If you wish to help the developer, you must purchase the version; otherwise, it makes no difference.
Dolphin – Nintendo GameCube & Wii – Beta
Dolphin and the Google Play Store's beta version are the best Android emulators for the Nintendo GameCube and Wii. If you enable or enroll in the beta version on the Play Store page, you will receive the most recent version of the emulator, which corresponds to the development version on their website.
NetherSX2 – Sony PlayStation 2 – Current
The most up-to-date and optimal version for emulating the Sony PlayStation 2 is NetherSX2-Current.
Recommended Frontends
- Daijisho
- EmulationStation
