Custom Keyboard
Suppose the thought of crafting a custom mechanical keyboard has ever crossed your mind. In that case, you're about to embark on an exciting journey through your ventures into this expansive and, at times, bewildering hobby. While the process might seem straightforward, it's more complex than setting a budget and expecting an instant custom creation. Let's navigate this landscape together.
First and foremost, it's crucial to gain a foundational understanding of the components that constitute a keyboard:
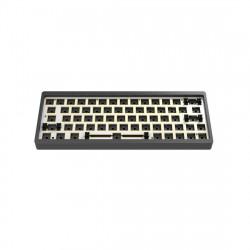
Keyboard Case
The case is essentially the keyboard's exterior housing, enveloping its internal components. Cases can be single-piece designs or composed of multiple parts. The choice of case is pivotal as it influences the aesthetic and functional aspects of your keyboard, including compatibility with specific internal components.
PCB (Printed Circuit Board)
Consider the PCB the keyboard's central nervous system. This is where you'll mount your switches and stabilizers. PCBs are available in solderable or hot-swappable variants, each catering to different assembly and switch interchangeability preferences.
Plate
The plate is a critical component that aids in securing your switches to the PCB. It ensures that the switch housings are firmly anchored, allowing for stable and consistent switch placement before soldering (solderable PCBs) or insertion (hot-swappable PCBs).
Stabilizers
Stabilizers play a crucial role in maintaining the equilibrium of larger keys such as shift, enter, and space bar, preventing excessive wobble, and ensuring a smooth actuation. They are an indispensable part of the keyboard.
Switches
The choice of switches is vast, with many options to suit various typing styles and preferences. We'll delve deeper into selecting the suitable switches for your custom keyboard, considering factors like actuation force, sound, and tactile feedback.
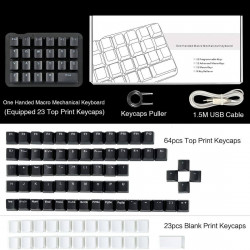
Keycaps
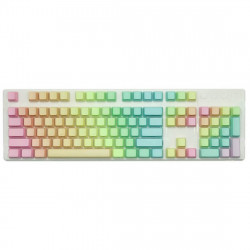
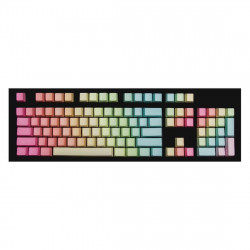
This is where personalization truly shines. Keycaps come in various profiles, sets, and artisan designs, available through numerous vendors. If you're accustomed to gaming keyboards from major brands, you're likely familiar with OEM caps. Cherry profile keycaps might be a smoother transition's most approachable starting point.
Embarking on the journey of building a custom mechanical keyboard is both a creative and technical endeavor. As we proceed, we'll explore each component in greater detail, guiding you through the choices and considerations that will help you create a keyboard that's uniquely yours.
Selecting the appropriate layout for your custom keyboard is your most significant decision in the assembly process. This choice can be daunting because of the uncertainty surrounding the ideal size or design for your needs.
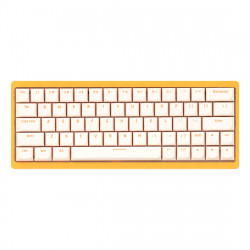
Standard keyboard sizes familiar to most include 60%, TKL (tenkeyless), and Full. However, the spectrum of available sizes extends beyond these options, offering 60%, 65%, 75%, TKL, and 1800 layouts. So, how does one navigate this plethora of choices?
When deciding on a keyboard size, several factors come into play, with desk space often being the primary consideration. For those with ample desk real estate, the size may not be a constraint, allowing for greater flexibility in choice. Conversely, a more compact layout, such as the 75%, might be more suitable for setups with limited space.
Another critical aspect to ponder is the intended use of the keyboard. If your work necessitates specific keys, such as an F row or arrow keys, this requirement will significantly influence your decision. For gamers who primarily rely on the WASD keys, a 60% layout might suffice, offering a streamlined and efficient design.
If you're transitioning from a standard full-size board and are still deciding which layout to choose, starting with a TKL or 75% layout could be wise. These layouts provide a comfortable middle ground, retaining the most essential keys while conserving space. The 65% layout, keeping arrow keys without sacrificing compactness, has emerged as a popular choice among gamers and general users, offering a balanced compromise between functionality and size.
Ultimately, selecting a keyboard layout is a highly personal decision that should be made after careful consideration of your specific needs, preferences, and workspace limitations.
Having zeroed in on the desired keyboard layout, the next step is choosing a case, a decision that's intricately tied to the mounting style you prefer. The mounting style affects not only the aesthetic appeal of your keyboard but also its typing feel and sound profile. Here's a simplified overview of the various mounting styles to help guide your selection:
Top Mount
In this style, the plate and PCB assembly are screwed directly into the top portion of the case. This method typically results in a firmer typing experience and a louder sound profile, reflecting some metallic characteristics of the case. You'll also notice more feedback and vibrations as you type.
Gasket Mount
Gasket mounting has gained popularity for its versatility and isolation to the plate/PCB assembly. This isolation minimizes case feedback and typing vibrations, offering a typing feel that can range from quite firm to very soft, depending on the implementation.
Gummy O-Ring Mount (Friction Fit)
This method employs a large o-ring that encircles the PCB/plate assembly, eliminating the need for screws. The result is usually a softer typing experience with a sound profile that leans towards the higher-pitched or "clacky" end of the spectrum.
Sandwich Mount
A less prevalent method is where the plate is clamped between the top and bottom parts of the case. Sandwich mounts typically provide a stiffer typing feel, abundant typing feedback, and a metallic sound influenced by the plate material.
Integrated Plate Mount
The plate is integral to the top case, leading to a very stiff typing experience. The sound produced varies but often veers towards muddier or sometimes metallic signatures.
Tray Mount
Common in more affordably priced prebuilt keyboards or cases, tray mounts, in their stock form, offer a stiffer typing feel, and the sound profile can vary significantly. Despite this, tray mount cases are arguably the most enjoyable to modify, capable of delivering an exceptional keyboard experience with the right tweaks.
Each mounting style offers a unique blend of typing feel and acoustics, making it essential to consider your preferences when selecting a case for your custom mechanical keyboard.
Having honed in on your case selection, the focus shifts to the PCB (Printed Circuit Board), a crucial component accompanying your keyboard kit. Alternatively, for some instances, you might need universal PCBs available through specific vendors. Here's an overview of critical aspects to consider about PCBs:
Flex Cuts: Some PCBs feature numerous cuts, known as relief or flex cuts, designed to foster a softer typing experience. This is especially effective when paired with a plate that similarly promotes flexibility. However, the potential for abundant flex cuts for a thinner sound profile is a notable downside.
Daughter Boards: Depending on the case design, some PCBs may require a daughter board to facilitate connections that might not align perfectly due to the case's internal architecture.
Hot-swap vs. Solderable PCBs: The choice between hot-swap and solderable PCBs is significant, offering distinct benefits.
- Hot-swap PCBs are ideal for individuals still exploring their switch preferences or anticipating experimenting with various builds. These PCBs eliminate the need for soldering, making them accessible for beginners or those with health concerns about soldering fumes. However, caution is necessary to avoid damaging switches when inserting switches into hot-swap sockets. Supporting the socket with a desk or a finger can mitigate the risk of popping it off.
- Solderable PCBs provide the flexibility to opt for numerous layout configurations, as the soldering process is manual. This option can be enjoyable for enthusiasts who like the hands-on aspect of building keyboards. The drawback is the necessity to desolder switches for any changes or corrections. This process can be challenging and potentially expensive if it requires purchasing specialized equipment like a desoldering gun.
Recommendation: A hot-swap PCB is an excellent starting point for those new to the keyboard-building hobby or seeking versatility. Its user-friendly nature and flexibility in switch experimentation without the need for soldering make it an attractive option for many enthusiasts.
When embarking on the journey of assembling a custom keyboard, the selection of a plate is a crucial step. The plate not only influences the rigidity of your keyboard but also its sound and compatibility with various layouts. While most keyboard kits include a compatible plate, if you're piecing together your keyboard from individual components, ensuring the plate's layout matches your keyboard's design is imperative.
Material Matters: Keyboard plates are available in a variety of materials, each affecting the typing experience and sound profile differently:
- Aluminum Plates: These offer a balanced typing experience, neither too stiff nor too soft, and produce a sound that's neither too high-pitched nor too deep. It's a great starting point for those new to custom keyboards.
- FR4 Plates: Made from the same material as PCBs, FR4 plates also provide a balanced feel with a sound profile similar to aluminum plates.
- Brass Plates: For those seeking a firmer typing experience, brass plates are the way to go. They typically yield a higher-pitched sound compared to softer materials.
- Plastic Plates (POM/Polycarbonate): These plates offer a softer typing feel with a more profound or smoother sound profile. They're an excellent choice for those seeking a less rigid typing experience.
Sound Profiles: The plate material significantly impacts the keyboard's sound. Stiffer materials like brass amplify higher-pitched notes, whereas softer materials like POM or polycarbonate lean towards deeper tones.
Recommendation: For a well-rounded experience, starting with an aluminum or FR4 plate is advisable. These materials offer good value, providing a satisfying typing experience and a balanced sound profile.
Keyboard Stabilizers: Beyond the plate, stabilizers are another essential component, particularly in ensuring the functionality and sound quality of larger keys such as the spacebar. The key is to select stabilizers that match the size of your spacebar and the quantity required for your keyboard layout.
While many stabilizers on the market can provide excellent performance, the secret to achieving the best feel and sound lies in proper tuning.
Recommendation: For those new to custom keyboards, choosing Durock stabilizers can be a wise choice. They're known for their quality and, with the proper tuning—using lubricant and perhaps a brush for application—can significantly enhance your keyboard's overall feel and sound. This approach allows for adjustments even after the keyboard is assembled, offering flexibility and ease in achieving the perfect setup.
Switches are the soul of a mechanical keyboard, offering a diverse palette of tactile sensations and auditory experiences. This variety, while enriching, can be a source of confusion for newcomers to the keyboard hobby. Here's an attempt to demystify switches without delving too deep into complexity.
Types of Switches:
- Linear: These switches offer a smooth, consistent keystroke without any tactile bump or audible click. They're favored for their straightforward actuation, making them popular for gaming and typing.
- Tactile: Tactile switches provide a noticeable bump mid-actuation, offering physical feedback to indicate a keypress. This feedback is appreciated by those who type a lot, as it can reduce the likelihood of bottoming out and, thus, fatigue.
- Clicky: Clicky switches are characterized by their audible click and tactile bump, delivering sound and physical feedback upon actuation. They're often chosen by typists who enjoy auditory cues for each keystroke.
Choosing a Switch:
Selecting a switch is highly personal, influenced by your typing style, noise tolerance, and desired feedback. While the array of options may seem daunting, the key is to start with the basics and explore from there. Remember, there's no universal "best" switch; it's all about what feels suitable for you.
Keyboard Keycaps:
Keycaps are the cherry on top of your custom keyboard, offering an avenue for personal expression and influencing the overall feel and sound of your typing experience.
- Profiles: From the tall, sculpted SA profile to the lower, more common Cherry profile, each keycap profile delivers a unique typing feel and sound. The profile you choose will affect the ergonomics and aesthetics of your keyboard.
- Materials: The primary materials for keycaps are ABS and PBT. ABS keycaps are known for their smooth texture and tendency to develop a shine over time, while PBT keycaps are more resistant to shine, often providing a slightly textured surface and a denser sound.
Compatibility:
When selecting keycaps, it's crucial to ensure they fit your keyboard's layout and accommodate specific features like RGB lighting. Some keycap profiles may not be compatible with particular switch orientations, leading to issues like interference with north-facing LEDs.
Advice: If you need clarification on compatibility or the best choice for your setup, consult your keyboard kit's seller or contact the community for guidance. The key to a satisfying build is ensuring all components harmonize, from switches to keycaps, to create a keyboard that's a joy to use and behold.
Finding keyboard parts for your custom build has become considerably more accessible, thanks to the proliferation of in-stock units and a vast array of components readily available online. To kickstart your journey, diving into one of the many vendor lists curated by the keyboard community is a practical first step. These lists can guide you to reputable sources for all the needed parts. Here's a checklist to ensure you've got everything required for your build:
- Keyboard Case: The foundation of your keyboard's aesthetics and structure.
- PCB (Printed Circuit Board): The heart of the keyboard, where all keypresses are registered.
- Stabilizers: Essential for larger keys to prevent wobble and ensure smooth actuation.
- Switches: The critical component that defines your keyboard's typing feel and sound.
- Keycaps: The face of your keyboard, available in various profiles and materials for customization.
- Lubricants: Used to enhance the smoothness of switches and stabilizers.
- Brushes: For applying lubricants evenly across switches and stabilizers.
- Soldering Iron: Solderable PCBs must attach switches.
- Switch Puller and Switch Opener: Tools for removing switches from the PCB and opening them for lubing or modification.
- Precision Screwdriver Kit: For assembling and disassembling various parts of the keyboard.
- Tweezer Kit: Useful for handling small components like screws and stabilizer clips.
In addition to readily available in-stock items, the custom keyboard community frequently participates in group buys. These collaborative, crowd-funded projects often offer a discount for contributing to the initial funding. While group buys can be a great way to get unique or custom parts, they typically have longer wait times and carry a slight risk, as with any crowd-funded endeavor.
By utilizing these resources and preparing with the right tools and parts, you're well on your way to creating a custom mechanical keyboard that fits your preferences and style.
Building a mechanical keyboard is an engaging project that blends creativity with technical skill. Here's a step-by-step guide to assembling your custom mechanical keyboard, ensuring a smooth and enjoyable building process.
Step 1: Testing Your PCB
Preparation: Have tweezers and a cable ready to connect your PCB.
Instructions:
- Use a program like VIA to test your PCB.
- Connect the PCB and gently tap each switch pad with tweezers to simulate a keypress.
- Ensure each critical registers in the program.
This step verifies the functionality of your PCB before proceeding further.
Step 2: Lubing and Installing Stabilizers
Preparation: Gather your stabilizers, PCB, lubricant, brush, and screwdriver.
Instructions:
- Lubricate your stabilizers thoroughly, following detailed tutorials if needed.
- Attach them to the PCB at their respective positions.
- Test the stabilizers by switching between them to check for smooth operation.
Step 3: Installing Switches
Preparation: Ready your switches, PCB, plate, and soldering iron (if applicable).
Instructions:
- Lay the plate over the stabilizers and start inserting your switches.
- For hot-swap PCBs, support the sockets to avoid damage.
- If soldering, ensure each switch sits flush against the PCB before soldering.
Step 4: Prepping the Case
Preparation: Assemble your keyboard case, gaskets or foam, daughter board (if any), and screwdriver.
Instructions:
- Install gaskets and the daughter board as required.
- Add any additional damping materials like foam to reduce hollow sounds.
- Place the PCB/plate assembly in the case, securing it according to the mounting style.
- Assemble the case.
Step 5: Adding Keycaps
Preparation: Ensure all switches are correctly installed.
Instructions: The final step is to place your keycaps onto the switches. This completes the build and gives your keyboard its distinctive look and feel.
Tuning Your Keyboard's Sound
After assembly, you might notice aspects of your keyboard's sound that you wish to adjust. Here are a few tips:
- Hollow Sounds: Use PolyFil or poron foam to dampen acoustic resonance without overly muting the keyboard.
- Quiet Keyboards: Experiment with different keycap materials or louder switches. Masking tape on the underside of the PCB can also amplify the sound.
- Rattling Stabilizers: Apply lubricant with a syringe directly to the stabilizers to eliminate rattle without disassembling the keyboard.
Final Thoughts
Customizing a mechanical keyboard is a personal journey. Preferences vary widely, and the hobby offers endless possibilities for experimentation and discovery. Remember, keyboards are a luxury, and it's easy to be swept up in the excitement. Stay mindful of your budget and enjoy the process of building and customizing your mechanical keyboard. Welcome to the vibrant world of custom keyboards!
